RSS

Blog posts of '2016' 'May'

LEARN and CREATE – under, up and through … or the wrap bracelet in ladder stitch - part 1

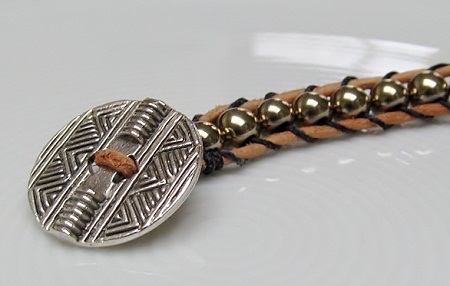
With the summer heat also come bare arms just begging for a bracelet with a hint of relaxed glamour. The wrap bracelet in the ladder stitch meets all that.

wrap bracelet in ladder stitch

Challenge:

  • Regular and symmetrical weaving.

Supplies for the wrap bracelet :

  • 6x6 mm beads
  • 1,5 mm leather cord
  • S-lon weaving cord # 18
  • a 1,5 to 2 cm button
  • needles and jewelry glue
  • scissors, flush cutter and a beading surface
  • optionally beeswax

Instructions for wrap bracelet in ladder stitch:

  • two wraps take about 1,20 meter of leather cord or 60 cm for a one wrap bracelet
  • cut the leather with your flush cutter
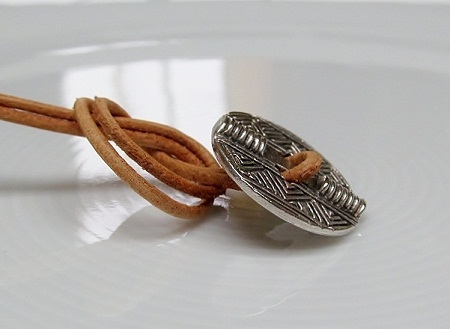
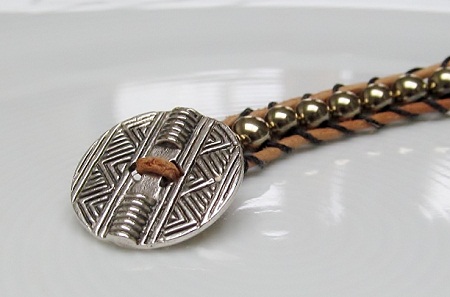
  • fold the leather cord in two, thread the button and pull it to the center
  • make an simple overhand knot with the doubled leather cord

wrap bracelet in ladder stitch - attach button

  • cut off about 2,75 meters of S-lon cord; you want to have enough weaving cord to finish the bracelet in one go
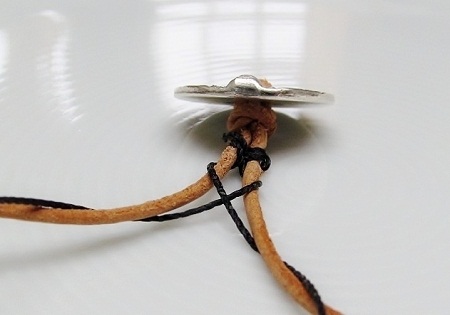
  • pass the S-lon cord with a needle through a part of the leather knot and pull the cord through up to halfway
  • place the S-lon cords on the outside and keep both pieces of leather in the middle

Start braiding:

  • *pass the left weaving cord over the left leather cord and then underneath the right leather cord
  • next, pass the right weaving cord over the right leather cord and underneath the left leather cord
  • tighten up the weaving cords**, you just crossed two S-lon cords
  • while repeating the movement from * till ** three or four times, you will be creating a small piece in herringbone

wrap bracelet in ladder stitch - attach S-lon

  • tighten by pulling the weaving cords towards the base and secure them with a simple overhand knot
  • to work more easily, pass the weaving cords through some beeswax
  • wrap each weaving cord twice around its matching leather cord,
  • thus the left weaving cord around the left leather cord and the right weaving cord around the right leather cord
  • string a 6 mm bead on the right weaving cord
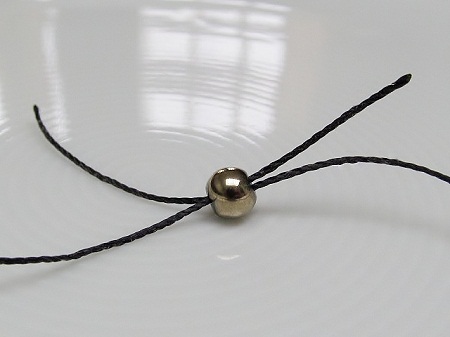
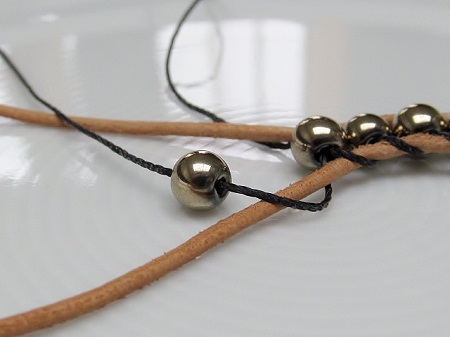
  • * pass the left weaving cord through the other side of the beads, thus in the opposite direction

wrap bracelet in ladder stitch - crossing the weaving cord

  • you just crossed the two weaving cords in the bead
  • now go with each weaving cord underneath its leather cord and then upwards,
  • thus right below right and then upwards
  • left below left and then upwards**

wrap bracelet in ladder stitch - preparing to attach the next bead

  • string another 6 mm bead on the right weaving cord and repeat from * till **

SEE - part 2

LEARN and CREATE – under, up and through … or the wrap bracelet in ladder stitch - part 2

CONTINUATION: the ladder stitch

  • this resumes to the following S-lon cord movement:
  • for the leather cord = right underneath and up, left underneath and up
  • for the bead = right through right and left through left
  • in short: under, up and through
  • maintain the tension in your S-lon cord and continue till you obtain the desired length.

bracelet in ladder stitch

To finish:

  • wrap the left weaving cord twice around the left leather cord en
  • wrap the right weaving cord twice around the right leather cord
  • cross the two weaving cords and make twice an overhand knot
  • create a small piece in herringbone:
  • * put the left weaving cord over the left leather cord and then underneath the right leather cord
  • after that you go with the right weaving cord over the right leather cord and underneath the left leather cord **
  • repeat this movement from * till ** three or four times
  • make twice a simple knot and assure yourself that they are in the center in between the pieces of leather
  • apply on both sides of your work a dab of glue on the knots.
  • add a loop for the button: make an overhand knot with the two leather cords together at a distance of 1,5 to 2 cm
  • do not tighten the knot completely, but first make sure that the loop is large enough for the button
  • if that is the case, apply a drop of jewelry glue inside the knot and tighten
  • let dry and cut the excess cords.

Comments:

  • vary also the width. For example, create 30 cm with 4 mm beads, 30 cm with 6 mm beads and to finish again 30 cm with 4 mm beads.
  • when working with smaller beads, you might want to replace S-lon cord with doubled S-lon thread.
  • Of course, instead of working with a single bead, you can line up several small beads or seed beads 6/0, give your imagination free reign. However, it would be advisable to work with 2 mm leather cord.
  • If you create this bracelet for sale, add two loops for the button so you may adjust the bracelet's size easily.

The plain whipping:

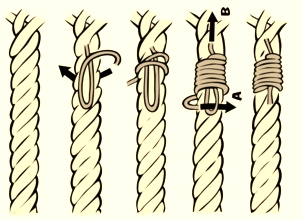
  • for a professional finishing touch and to hide the glue and knots, cover the ends with silk wrapping (S-lon weaving cord) in a harmonizing or contrasting color and a plain whipping knot (common whipping or wolf whipping). Plain whipping is an elegant ligature method which prevents the threads to unravel.

plain whipping or wrapping

Choose your favorite beads @ http://dunebeads.com/en/ !

Do not forget: have fun, because practice makes perfect. See you soon!