RSS

Blog

LEARN and CREATE – the not so flat, flat Cellini bracelet - part 1

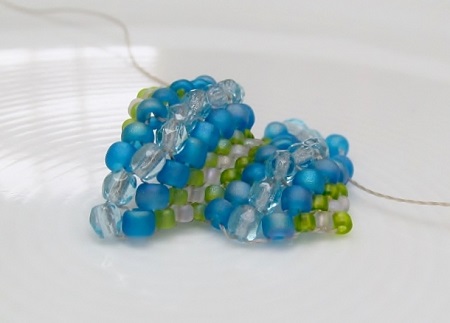
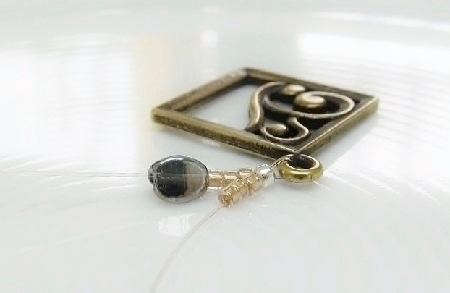
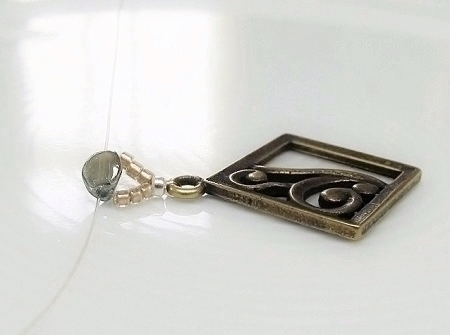
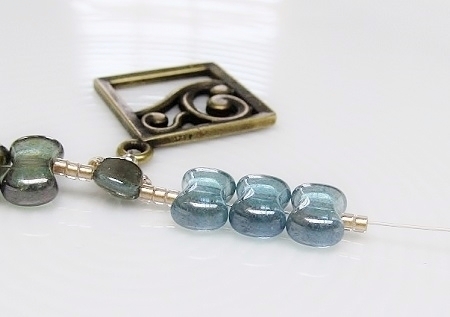
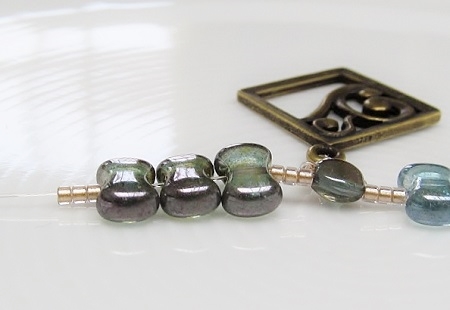
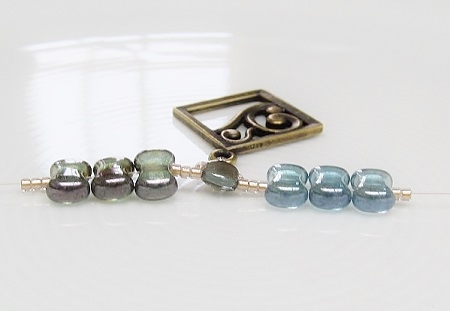
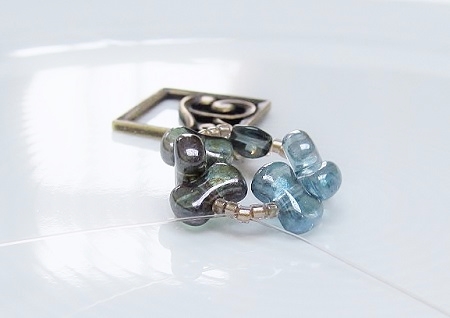
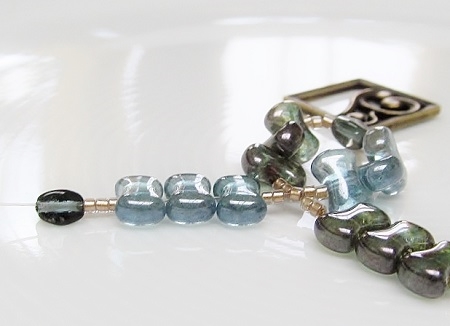
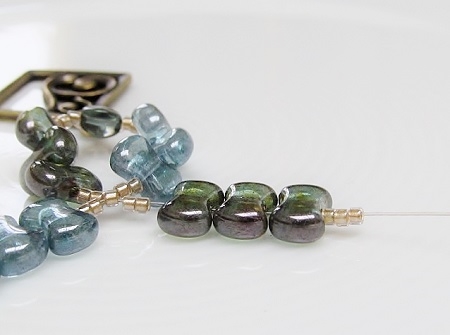
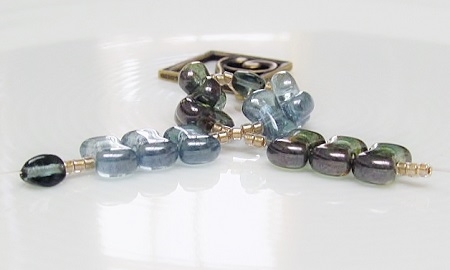
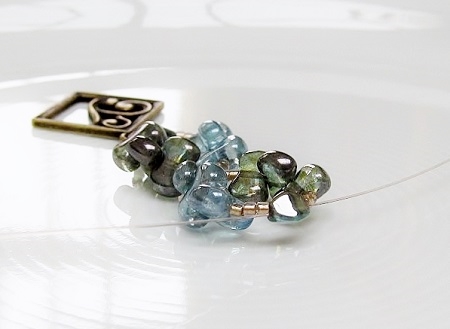
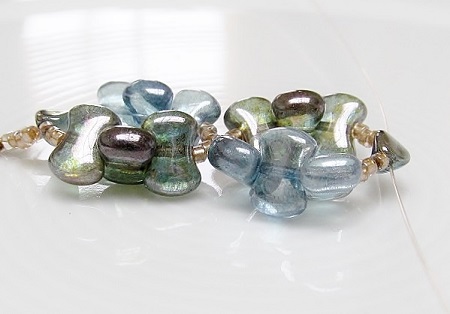
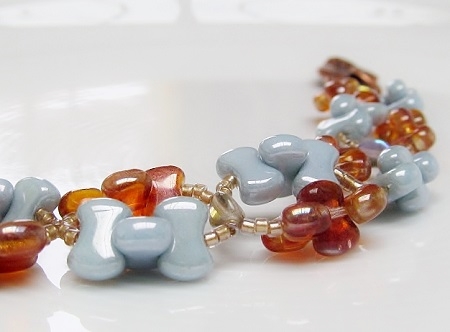
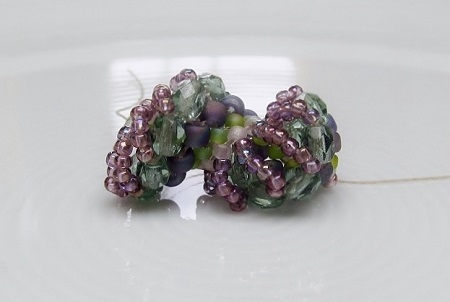
The flat Cellini stitch is nothing more than flat, even-count peyote, but with different bead sizes which will add a scalloped texture to your work and accentuate the diagonal movement in it. The design consists of small aba + large ABA waves mirroring each other.

flat Cellini

Challenge:

  • prior knowledge: flat even-count peyote
  • with the change of direction at the end of each row comes a change in perspective of the color & size choice which may seem daunting at first
  • with a line-up of 10 beads at the start, the double pattern of embracing a central bead is always incomplete on one side and as a consequence with each odd row you try to complete the design aba + ABA

Supplies for a flat Cellini bracelet:

  • 11/0 seed beads in 2 colors: 11/0 color A and 11/0 color B (or small central bead); meaning color A embracing color B
  • 3x3 mm fire-polished beads (or large central bead)
  • 8/0 seed beads, which will embrace the 3x3 mm fire-polished bead
  • JBB toggle, thread, scissors and beading mat.

Weaving instructions for the flat Cellini:

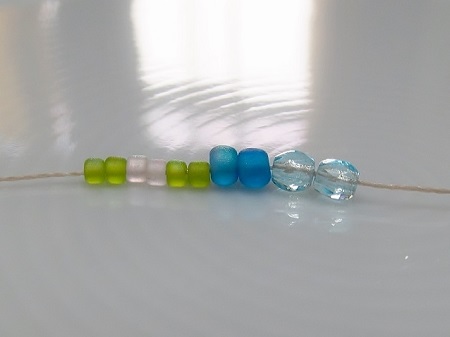
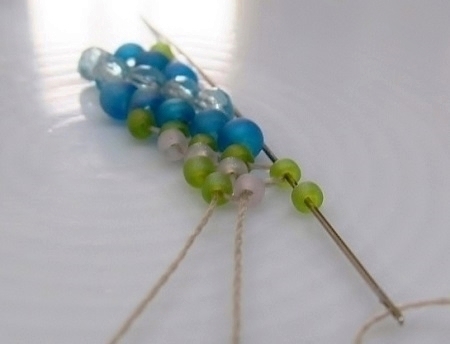
  • line up little heaps of beads in the sequence you want to maintain
  • leave about 40 cm tail thread so you may easily add your clasp afterwards

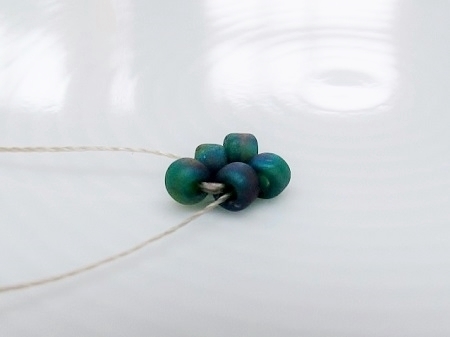
flat Cellini - row 1 and 2

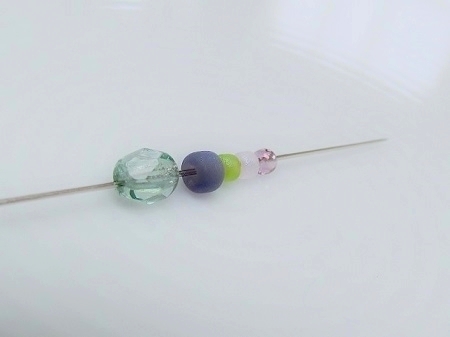
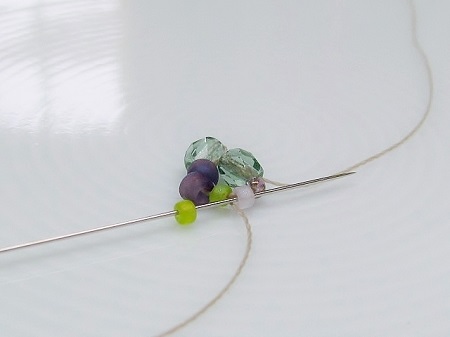
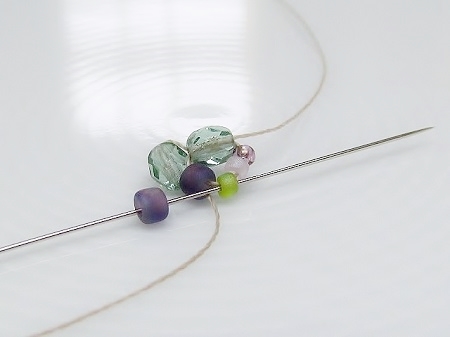
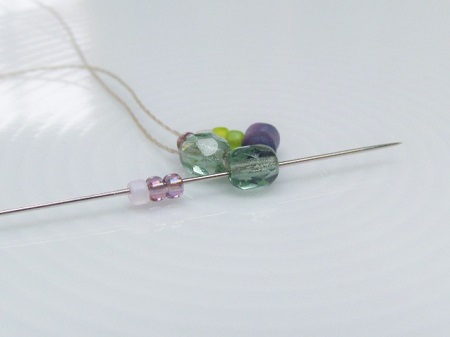
  • set up row one and two: two 11/0 color A, two 11/0 color B, two 11/0 color A, two 8/0 and two 3 mm beads

flat Cellini - row 3

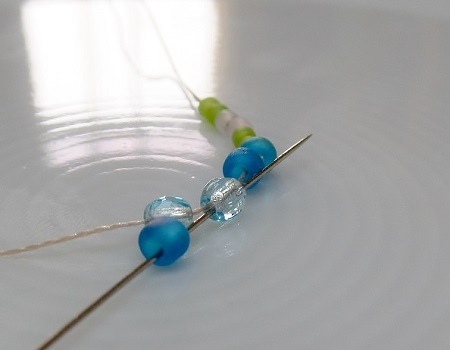
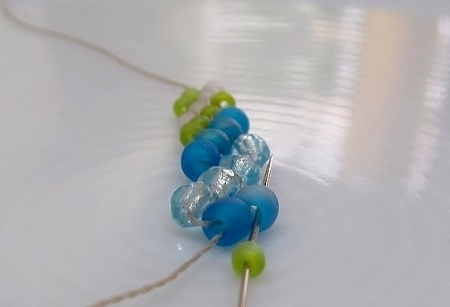
  • row three in regular even-count peyote: skip a 3 mm bead, add a 8/0, skip a 8/0 bead, add a 3 mm bead, skip a 11/0 A bead, add a 8/0, skip a 11/0 B bead, add a 11/0 color A, skip a 11/ A bead and add a 11/0 color B
  • you end up with 8/0, 3 mm, 8/0 + color A, color B on top = ABA + ab (a is missing) pattern
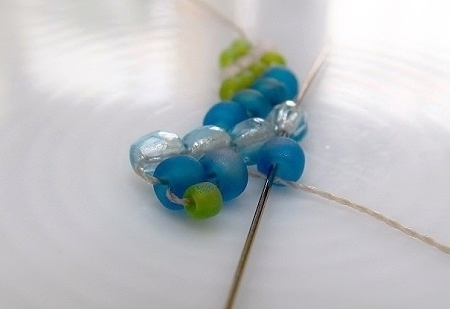
  • as a consequence, you have added a bead in the same color as the one you just went thru and will do so whenever you work towards the tail

flat Cellini - working towards tail

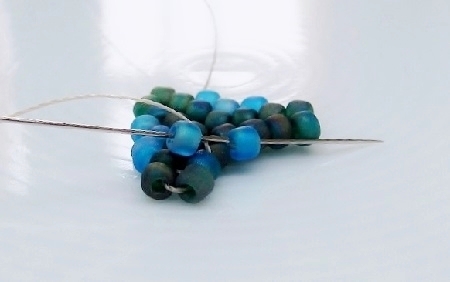
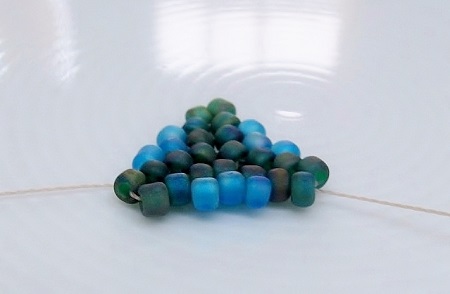
  • the moreover, you added a bead to each second bead of a pair and when you look back on your work you will see that the beads are lined up diagonally

SEE - part 2

LEARN and CREATE – the not so flat, flat Cellini bracelet - part 2

CONTINUATION: the flat Cellini

  • persevere as once you have finished the first four rounds, it will become easier
  • row four: continue regular peyote by adding to every second bead a bead in the same color as the one you want to go thru; for instance, you have to go thru a 11/0 B, you add a 11/0 B, you want to go thru a color A, you add a color A and so on
  • in short, you make the opposite color choice when you work away from the tail than when you work towards the tail; you pick up a bead in the same color as the one you will go thru

flat Cellini - working away from tail

**note, all even rows will be constructed in this way, to add a bead you look forwards to the color/size of the following bead**

  • row five: you recommence the "small" diagonal color scheme from the start (aba) by skipping a 8/0 and adding one 11/0 A,

flat Cellini - row 5 - recommence aba

  • to continue row five you add a bead in the same color as the one you just left; for example, you come out of a 8/0, you add a 8/0, coming out of a 3 mm, add 3 mm and so on

***all odd rows are built in this way, to add a color/size you look backwards to the bead you left***

  • Do tighten your thread regularly as it will give you that curly shape you seek
  • row six: you want to go thru a 11/0 A, add a 11/0 A and continue ** … **
  • row seven: skip 11/0 A, add a new 11/0 B and continue *** … ***
  • row eight: add a 8/0, continue ** … **
  • row nine: add a 11/0 A (or the second a of the aba color scheme) … and … continue *** … ***

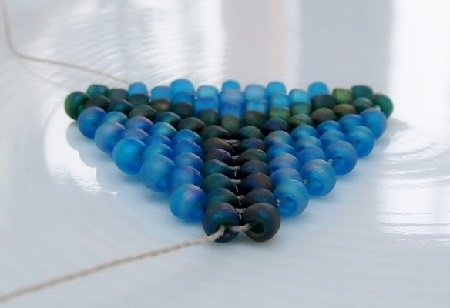
Flat Cellini Stitch

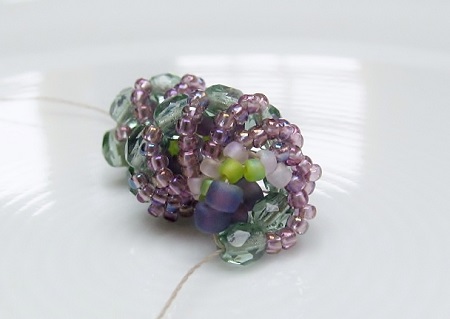
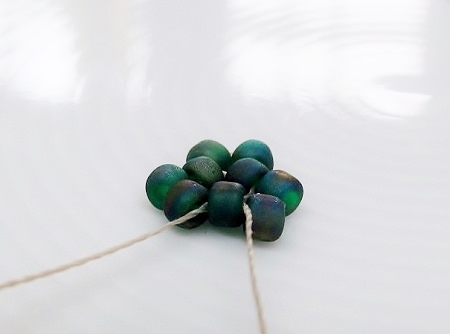
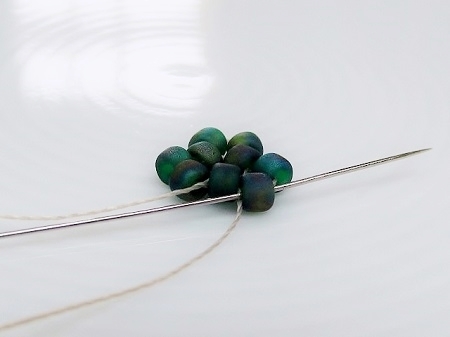
  • while your bracelet takes shape, the scalloped texture will appear more and more
  • finish by attaching a toggle clasp and enjoy your creation

Choose your beads and findings @ http://dunebeads.com/en/czech-fire-polished-round-beads !

Do not forget: practice makes perfect. Have fun, see you soon!

LEARN and CREATE – the CoCo-rico necklace and the eight-shape - part 1

Simple and playful, the CoCo-rico necklace is another example of the technique of crossing wires while creating an eight-shape. By alternating the color scheme after each intersection you also produce the illusion of winding the two wires or threads around each other; and of course, a shorter version will offer you a charming bracelet.

CoCo-rico necklace - river thu the woods

Challenge:

  • The change of direction of the wires in the intersections will definitely ask you to pay attention.

Supplies for the CoCo-rico necklace:

  • 6x8 mm Czech CoCo beads in two colors: CoCo A, CoCo B
  • 5x3 mm pinched Bicone beads
  • Delica size 11/0
  • polyethylene thread or fishing thread or FireLine
  • JBB toggle and crimp beads or crimp tubes
  • pliers, scissors and beading mat.

Weaving instructions for the CoCo-rico necklace:

  • cut off about 140 cm polyethylene thread, slide a part of the toggle to the middle and fold the thread in two
  • slide a crimp tube or crimp bead over both threads and attach the clasp
  • note: you will be working with the two threads
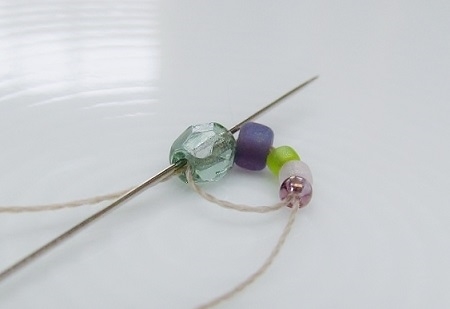
  • side one: string on 3 Delica's and 1 pinched Bicone

CoCo-rico necklace - start

  • side two: string on 3 Delica's and pass the thread in the opposite direction through the Pinch bead of side one

CoCo-rico - crossing 1

  • eight-shape *side one top eight: pick up 3 Delica's, 3 CoCo A and 3 Delica's

CoCo-rico - side 1, top eight

  • side two top eight: pick up 3 Delica's, 3 CoCo B and 2 Delica's

CoCo-rico - side 2, top eight

  • and cross the wire by going in the opposite direction through the last Delica of side one

CoCo-rico - top eight

  • pull the two threads

CoCo-rico - crossing 2

  • eight-shape side one bottom eight: pick up 2 Delica's, 3 CoCo B and 3 Delica's and 1 pinched Bicone

CoCo-rico - side 1, bottom eight

SEE - part 2
LEARN and CREATE – the CoCo-rico necklace and the eight-shape - part 2

CONTINUATION: the eight-shape in the CoCo-rico necklace

  • side two bottom eight: pick up 2 Delica's, 3 CoCo A and 3 Delica's

CoCo-rico - side 2, bottom eight

  • and pass your thread in the opposite direction through the pinched Bicone of side one

CoCo-rico - bottom eight

  • pull both threads**

CoCo-rico - crossing 3

  • between two pinched Bicone, you have created an eight-shape, corresponding to one section

CoCo-rico - eight-shaped section

  • repeat from * till ** until you obtain the desired length
  • add a crimp tube or crimp bead and the second part of the toggle and attach it

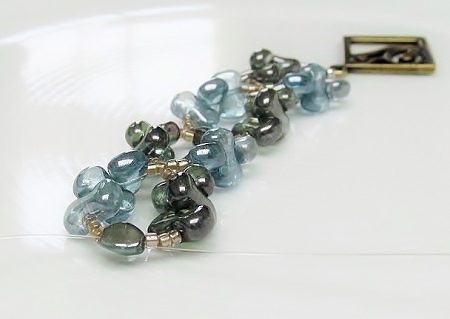
CoCo-rico bracelet - fire and ice

Choose your beads and findings @ http://dunebeads.com/en/czech-druk-beads-pinch-beads-and-coco-beads !

Do not forget: practice makes perfect. Have fun, see you soon!

LEARN and CREATE – the Dutch spiral - part 1

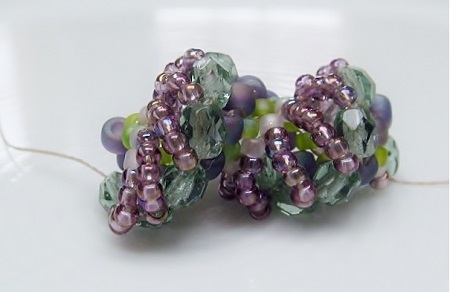
Light and airy, the Dutch spiral has the structure of a peyote rope, but it has one of its sides falling in loose loops. Make a small loop version for daytime and a strikingly stunning wide one for the evening.

Dutch spiral in spring colors

Challenge:

  • Understanding the thread path and the color scheme of the Dutch spiral. Unlike the peyote spiral the next bead you pick up is always in the same color as the bead you just exited.

Observations:

  • You may vary the length of the loose loops at will and thus work gradually from small to large and vice versa
  • Moreover, you may choose for a narrower or a wider "fixed" sewn part.

Supplies for the Dutch spiral:

  • needle and thread
  • scissors and beading mat
  • for the “fixed” sewn part:
  • 4x4 mm Czech fire-polished beads
  • size 8/0 seed beads
  • size 11/0 seed beads in two colors: fixed 11/0 A and fixed 11/0 B
  • for the loose loops:
  • size 11/0 seed beads: loose 11/0

Weaving instructions for a tapered Dutch spiral:

  • to form a tapered point, we let the loose 11/0 “grow”, that is why in each round we pick up an extra loose 11/0 bead (round 1 = 1 loose 11/0, round 2 = 2 loose 11/0, round 3 = 3 loose 11/0 etc.)
  • therefore make in the color scheme you want to keep on “growing” piles in order for you to work smoothly
  • to create the first round:
  • take a length of thread, pick up 1x 4 mm bead, 1x seed bead 8/0, 1x fixed 11/0 A, 1x fixed 11/0 B and 1x loose 11/0

Dutch spiral - start

  • go a second time through all the beads and go through an extra bead to create a circle
  • You will exit from a 4 mm bead

Dutch spiral - base or first round

  • second round:
  • *pick up 1x 4x4 mm, go through the 8/0 and tighten so that the new bead fits partially in between the previous 4 mm and the 8/0

Dutch spiral - round 2 - add 4x4 mm

  • as you end with a 8/0, you pick up a 8/0, go through the next 11/0 A bead and tighten the thread

Dutch spiral - round 2 - add size 8

  • you end with a 11/0 A beads, so pick up a 11/0 A and go through a 11/0 B

Dutch spiral - round 2 - add size 11A

  • you end with a 11/0 B, so pick up a 11/0 B** as well as 2 loose 11/0
  • as these are the last beads forming the loose loop, you skip the loose 11/0 from the previous round, make a step-up and go through the second 4 mm bead

SEE - part 2
LEARN and CREATE – the Dutch spiral - part 2

CONTINUATION: the Dutch spiral

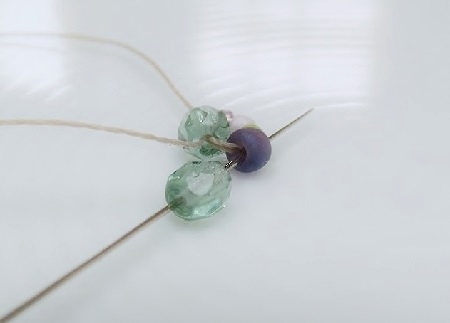
Dutch spiral - round 2 - add 11B and 2x 11 loose

  • note that, just like with peyote, you have protruding beads and that you build further with those; moreover they coincide with the second bead of each color group of 2

Dutch spiral - groups of 2

  • In round 3, repeat * till ** and pick up 3 loose 11/0 before you through the second 4 mm bead
  • In round 4, repeat * till ** and pick up 4 loose 11/0 before you through the second 4 mm bead
  • etc. until you obtain the desired width of the loose loops, usually one chooses for a loop of about 6 beads

Dutch spiral - 6 bead loop

  • to finish, you will “decrease”, so you have to pick up one loose 11/0 bead less in each round

Play around with colors and design ideas, enjoy !

Of course, we would love to see you choose your beads and findings @ http://dunebeads.com/en/ !

Do not forget: have fun, because practice makes perfect. See you soon!

LEARN and CREATE – triangular shaped peyote - part 1

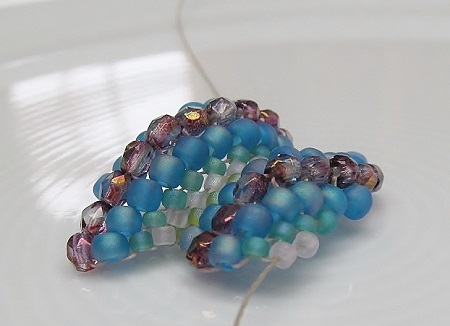
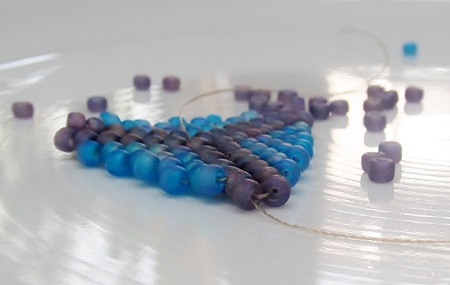
Once you get the hang of it these fun little triangular shapes are easy to make as you use only regular flat peyote and increases. Two triangles make a cute pair of earrings and a bunch of them could be a playful set of charms.

Challenge:

  • Understanding the thread path and positioning the beads of the corners.

peyote triangle in turquoise blue AB and amethyst purple AB

Supplies for the peyote triangle:

  • Japanese seed beads size 8/0 or 11/0 in two colors, one color for the sides (SI) and one color for the seams (SE)
  • needle and thread
  • scissors and beading mat

Weaving instructions for a triangle in peyote stitch:

  • make little heaps of 6 beads (SE), as this will form the constant in creating the corners of each round; the sides will be lengthened with each round
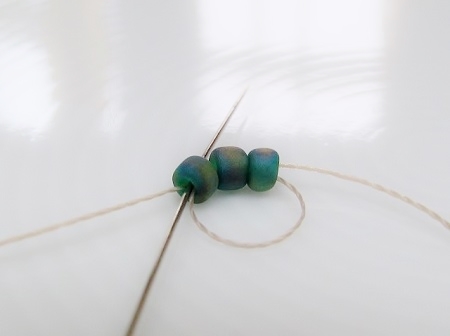
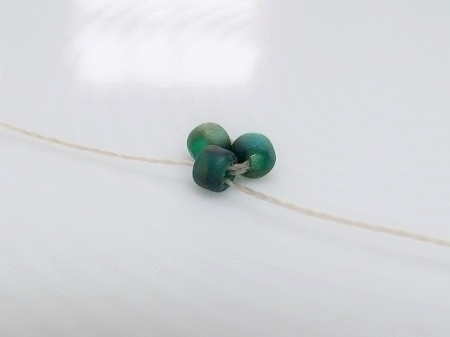
  • to create your first round: take a good length of thread, pick up 3 beads (SE), pass a second time through all of them and go through one more bead to create a little triangle

Peyote triangle - set-up

Peyote triangle - center

  • round two: pick up 2 beads (SE), go through the next bead, pick up 2 beads (SE), go through the next bead and repeat once more
  • important: each time you add 2 beads, go with your needle under the thread between those two beads, pull slightly on the thread so you can reposition the 2 beads and put them awry

Peyote triangle - round 2

  • it follows that you add 2 beads (SE) to create the corners of your piece and will continue to do so for the seams
  • go through an extra bead to create a step-up and end up between the next two corner beads – you will continue to do so at the end of each row

Peyote triangle - ready for step-up to round 3

Peyote triangle - step-up

SEE - part 2
LEARN and CREATE – triangular shaped peyote - part 2
CONTINUATION: triangular shaped peyote

  • in round three you add the second color: *pick up 2 beads (SE), go through the next bead, pick up 1 bead (SI), skip a bead, go through the next bead** and pick up 2 beads (SE), go through the next bead, pick up 1 bead (SI), skip a bead, go through the next bead, repeat one more time from *to**
  • go through an extra bead to create a step-up
  • have a closer look: on each corner you will have added 2 beads (SE) per stitch, while on the sides you have added only 1 bead (SI) per stitch at a time, the more over the corners are in a different color from the sides = this schema will continue throughout your piece
  • round four: add 2 beads (SE) on corner A, add 1 bead (SI) to the side and once more 1 bead (SI) to the side, add 2 beads (SE) on corner B, add 1 bead (SI) to the side and once more 1 bead (SI), add 2 beads (SE) on corner C, add 1 bead (SI) to the side and once more 1 bead (SI) to the side and make a step-up by going through the next bead

Peyote triangle - round 4

Peyote triangle - round 4, peyote on the sides

  • to summarize, you have made an increase on the corners, regular peyote on the sides and a step-up to access the next round
  • notice also that the corner beads sit awry or cattywampus and tower above the sides

  • round 5: add 2 beads (SE) on each corner and add 3 times 1 bead (SI) in regular peyote on the sides
  • round 6: add 2 beads (SE) on each corner and add 4 times 1 bead (SI) on the sides
  • round 7: add 2 beads (SE) on each corner and add 5 times 1 bead (SI) on the sides
  • round 8: add 2 beads (SE) on each corner and add 6 times 1 bead (SI) on the sides ... and so on
  • In the last round you may add a single bead (SE) in each corner instead of 2 beads and add a little loop on the last corner
  • to fix your thread, zigzag through your finished piece

Play around with colors and design ideas, enjoy!

Peyote triangle

Of course, we would love to see you choose your beads and findings @ http://dunebeads.com/en/delica-seed-beads-size-11-japan !

Do not forget: have fun, because practice makes perfect. See you soon!

COLOR and FASHION 2017


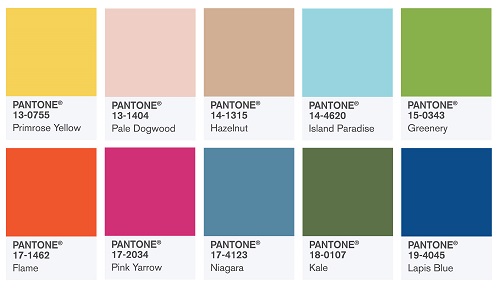
As usual, the color experts of the Pantone institute developed the colors for 2017 and the fashion designers selected their 10 favorites out of it.

Pantone colors 2017

The color of the year, a tangy spring green, is simply called “greenery”.

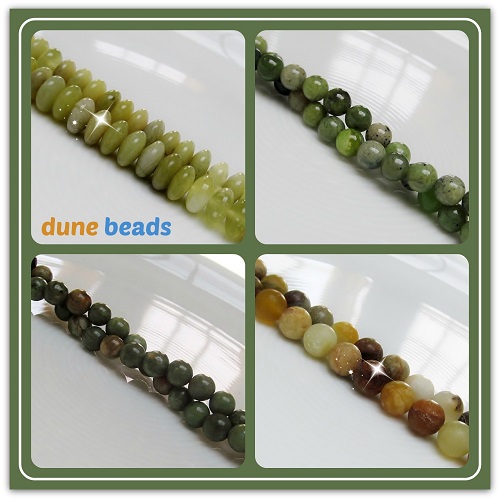
dune beads, green gemstones

The ten Pantone colors could be summarized as follows:

  • two greens: a bright “greenery” green and a darker grey-green “kale”
  • three blues: a light turquoise “island paradise”, a grey-blue “Niagara” and an deep “lapis” blue
  • two pinks: a subtle “pale dogwood” pink and a brighter “yarrow” pink
  • three warm colors: a vivid “primrose” honey yellow, an intense orange red “flame” and a neutral “hazelnut” beige rose.

As a result :

  • the cold tones, such as blue, grey-blue, violet blue and the variations of pink will dominate the scene. This inevitably will remember you the pastel colors of 2016. 
  • it should be noted that this time both the rich dark and the light tones will be present and 
  • it is very likely that the classic “Niagara” denim blue will overshadow “greenery”.

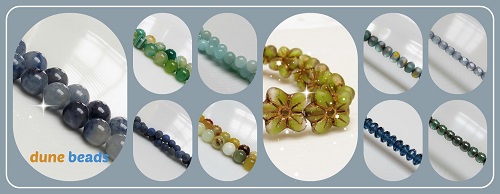
Dune beads and pantone 2017

With this you are ready to face Valentine and a colorful year.

Have a great happy day ... @ https://dunebeads.com/en/gemstone-beads-by-finishing-name-and-size !

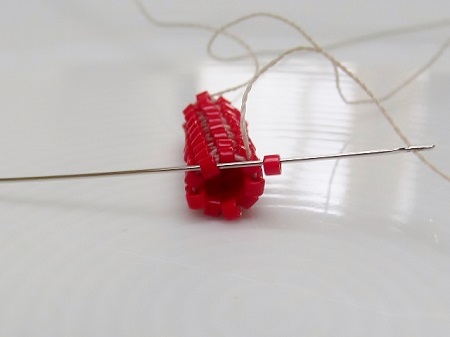
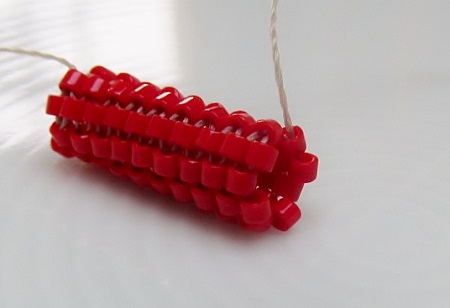
LEARN and CREATE – the easy odd-count tubular or spiral peyote stitch

If the step-up of the even-count tubular peyote seems daunting to you, try out the uncomplicated odd-count spiral peyote. This easy tubular peyote stitch is very accessible and a perfect project for beginners.

odd-count tubular peyote

Challenge:

  • Understanding the thread path and controlling the thread tension.

Supplies for the bangle bracelet in tubular peyote stitch:

Weaving instructions for the tubular even-count peyote stitch:

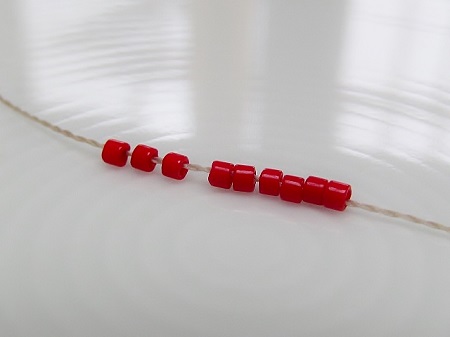
  • take a length of thread, pick up 9 Delica beads, while leaving a generous thread tail to hold

Odd-count tubular peyote - starting

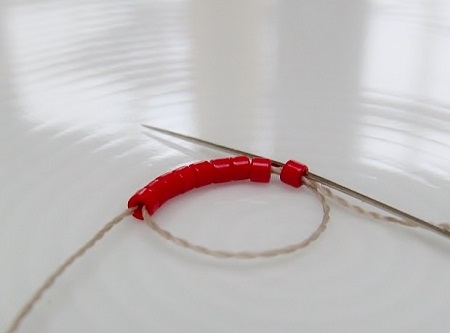
  • to make a circle, stitch back through all the beads as well as one extra bead

Odd-count tubular peyote - base, circle

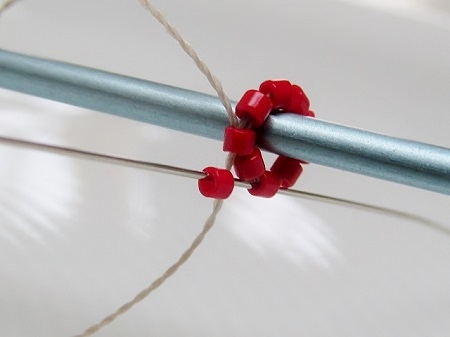
  • put the circle over the right size dowel in the sense that the beads are aligning nicely
  • block the tail of your thread on the dowel with your fingers
  • just like with regular flat peyote, to create the first row, you *pick up a new bead, you skip a bead and you go through the next bead**

Odd-count tubular peyote - first round on dowel

  • to ensure a tubular shape, tighten your thread so that every new bead stacks nicely on top of the preceding round of beads
  • repeat * ... ** three more times
  • at the end of the row, you will see two beads sitting next to each other at the same level

Odd-count tubular peyote - end of row

  • to start the next round and close the gap, pick up a bead and go through the next bead which sticks out

Odd-count tubular peyote - pick up, skip and thru the next bead

  • work slowly and carefully in the beginning and persevere as stitching will get easier
  • after a few rounds you can put the dowel aside
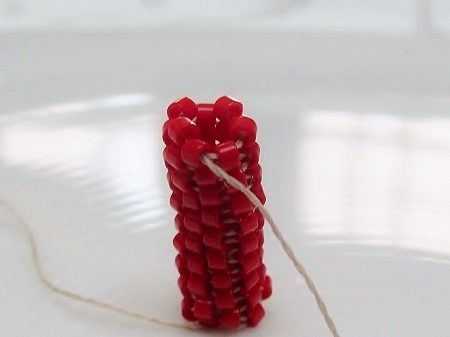
  • continue until you get the desired length

Odd-count tubular peyote or odd-count spiral peyote

Observation :

  • As you fill out the gap created by two beads sitting next to each other at the same level at the end of a row, you will always find one bead sticking out at the top of your work.  Therefore, it is advisable to use end caps to finish your necklace.

See you  later!